Fine art scanning & Giclee printing for artists & photographers
Services
Main services below, if you can’t find what you’re looking for, please contact me.
Scanning
Scanning your original media.
Scanning is the first part of the process for digitising and archiving your artwork for reproducing into Giclee prints.
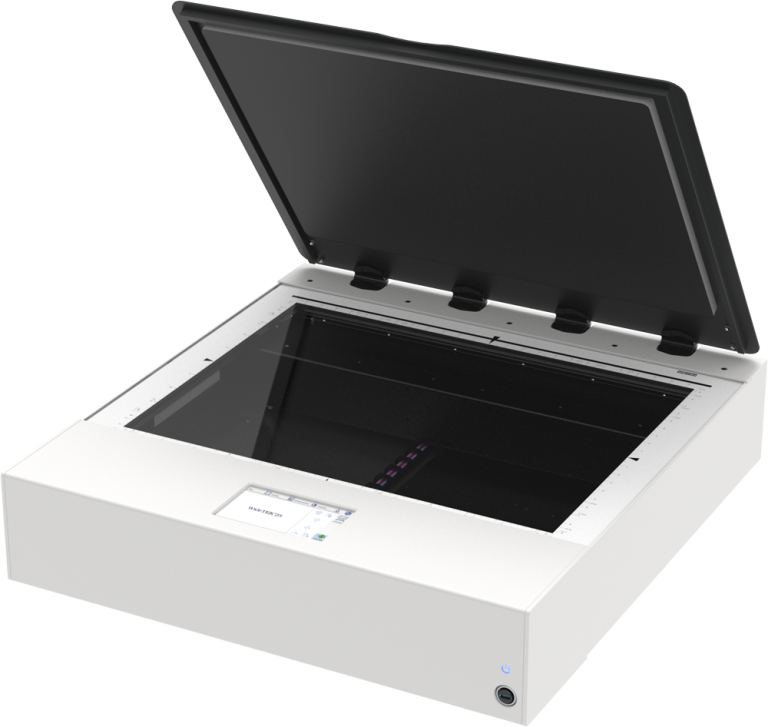
All scans are created using a calibrated and colour managed high performance flatbed CCD scanner capable of digitising and archiving artwork and photography at museum standards.
■ Originals up to A3 scanned at 600ppi (pixels per inch).
■ Originals from A2 and beyond scanned at 400ppi.
Originals for scanning.
■ Negatives, glass plates (fluid mount) up to 10"x8", see technical information below.
■ Transparencies (fluid mount) up to 10"x8", see technical information below.
■ Photographs
■ Drawings
■ Paintings / canvas (on wooden stretchers).
Original media styles for scanning.
■ Tempera
■ Oil
■ Acrylic
■ Gouache
■ Watercolour
■ Charcoal
■ Pastel
■ Chalk
■ Graphite
■ Coloured pencil
■ Pen & Ink

Giclée Fine Art Printing
Fine art and photographic reproduction.
Giclee printing produces gallery quality prints for artists and photographers that require reproduction from their original artwork and digital camera files providing exquisite detail, sharpness, wide colour gamut and depth.
Giclee prints are produced on a wide selection of museum grade fine art and photographic papers of various substrates, to suit all media styles printed with lightfast pigmented inks.
Originals for Giclee reproduction.
■ Fine art
■ Photographs
■ Drawings
■ Paintings
■ Canvas

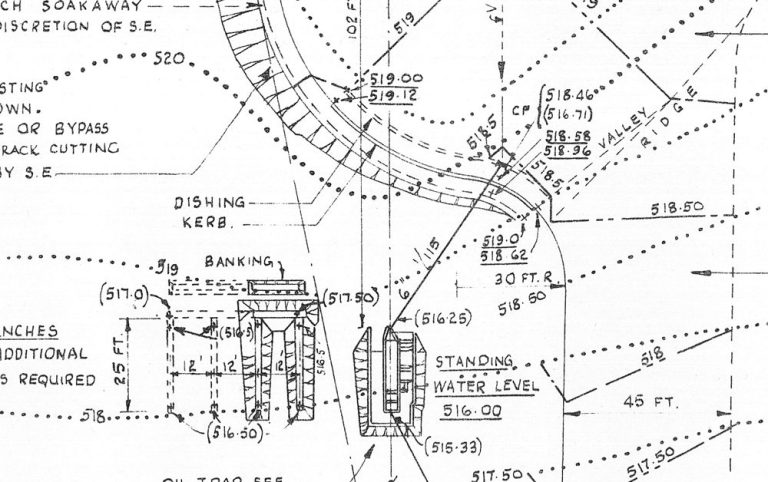
CAD Tracing & Design
CAD (Computer aided design).
Computer aided design digitally creates 2D drawings and 3D models using vector based graphics, that can be printed at any size without loss of detail. CAD is used mainly for architectural, mechanical, electrical, and component drawings. It is also used in the movie and gaming industry.
CAD drawing services available.
■ CAD tracing from scanned images and sketched designs re-drawn into clean vector graphics
■ Heraldry designs / crests / coat of arms
■ Insignia designs
■ Logo designs
■ Fire alarm technical and zonal plans
Note:
All completed vector artwork will be drawn accurately to the original image / design supplied by the client, however, complexity of rendering regarding colour gradients, lighting effects are based on agreed time allocated for job completion.
If the image / design contains a higher level of detail and rendering then more time and cost may be required.
If client supplies imagery showing less than desired detail or low resolution, then a best guess will be used for representation of the original.
Plan Printing
Plan printing for architects, builders, property developers.
Printed full colour on 90gsm paper or 170gsm coated.
Folded A4 as standard, rolled on request.
■ Architectural / floor / elevation / roof plans
■ Mechanical
■ Electrical
■ Plumbing
■ Carpentry
■ Concrete
■ Masonry / stonework
■ HVAC (heating / ventilation / air conditioning)
■ Interior design
■ Landscape design
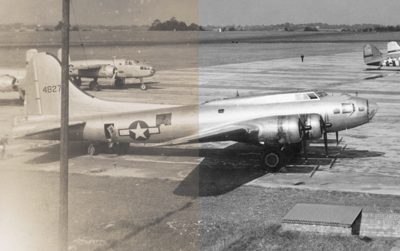
Digital Retouching
Digital retouching, restoration and manipulation.
Digital imaging software and techniques are used to enhance and restore faded colour, and repair damage from scanned photographs or fine art, also spotting and retouching out any imperfections caused by physical damage, age, stains, or fungal issues found in the emulsion of old prints.
Improved and restored digital files are saved as uncompressed high resolution tiff files for archiving and protecting historical imagery.
Grading of services available to suit requirements listed below.
Please call 07815 694252 or email mike@chilternimageservice.co.uk to discuss your requirements.
■ Spotting / dust and blemish removal
■ Enhancement / colour and tonal correction
■ Retouching / replacing, removal of subjects
■ Manipulation / adding, combining subjects into one
Common uses for retouching and restoration.
■ Archiving / preservation
■ Advertising
■ Fashion
■ Politics

Competitive Pricing
Technical information
Reflective Scanning
Reflective scanning describes objects that have light reflected from their surface such as artwork and photographs. The light source is located below the media in the flatbed scanner. The reflected light passes through mirrors, optical lens, and then captured by a CCD (charged coupled device) converting photons to electrons into a digital file.
Transmissive Scanning
Transmissive scanning describes objects that have light transmitted through their emulsion such as negatives and transparencies. Scanners that include a transmissive capability also have a light source above the media in the lid of a flatbed scanner. The transmitted light is passed to the CCD in the same way as reflective scanning.
Standard dry scanning
Standard negative and transparency scanning involves inserting the media into plastic frame holders, located in place on the glass scanning bed.
Fluid mount scanning
An evaporative scanning fluid is applied on the glass scanning bed and the media is placed onto the fluid. Additional fluid is applied on top of the media then a sheet of optical grade transparent Mylar is placed on top sealing the media inside.
This creates a vacuum between the glass and Mylar sheet eliminating any warping of the emulsion, ensuring accurate focusing across the entire image.
A soft scratch free lens cloth or similar is used to apply pressure onto the Mylar to remove any air bubbles trapped inside.
The fluid, manufactured specifically for the scanning industry, is completely harmless to negatives and transparencies.
Additionally, fluid mount scanning improves the quality of the scan and reduces any fine scratches and imperfections in the media emulsion.
However, it will not reduce visual imperfections from fungal growth that may be present in the emulsion of old negatives and transparencies.
A spotting and retouching service is available for this, please contact me either by telephone 07815 694252 or email mike@chilternimageservice.co.uk.
Giclée Printing
The term Giclée pronounced (zhee-klay) describes fine art printing using wide format inkjet printers with archival papers and pigmented inks.
Inkjets use the additive process (RGB) Red, Green, Blue.
Traditional printing uses a 4-colour subtractive process (CMYK) Cyan, Magenta, Yellow, and Black, which produces a narrow colour gamut, failing to achieve high saturation and depth.
Print for print, Giclée is more expensive than traditional litho or digital printing. Giclée inkjet printers use up to 12 ink colours achieving a fine art print superior in sharpness, detail, saturation, and depth.
Additionally, the simple operation of a Giclée printer provides printing on demand without having to pay large sums of money in advance for minimum quantity print runs that traditional printing companies would require for open and limited edition prints.
CAD Tracing & Design
CAD (computer aided design) is used mainly for design and development in architecture and Engineering.
Various uses include, residential and commercial building design and development to the aerospace industry creating highly complex and detailed 2 & 3 dimensional drawings.
CAD uses vector graphics, creating visual imagery directly from geometric shapes defined by points, lines, curves, and polygons to precise dimensions.
Any vector drawing can be imported and rastered into pixel based software such as Photoshop at any size desired then rendered with photographic textures, to simulate a visual representation of a physical object that doesn't actually exist yet.
A common example would be to view a visual representation of a building photographically textured inside and out before it is constructed.
Example of CAD tracing from supplied images in vector format shown below.
The left image is traced from a scan of a wwii sewn insignia patch and the right image is from an A5 size brochure cover for a client reproduced at 30"x45" as a poster.
If you would like something designed or traced into vector format and rendered please contact me to discuss your requirements, either by telephone 07815 694252 or email mike@chilternimageservice.co.uk.


8bit Depth vs 16bit Depth
Computers only understand binary numbers made from 0 and 1.
We need decimal values to understand what we see on screen.
Decimal value of 255 = 11111111 (8 binary digits - called bits)
Decimal value of 256 = 100000000 (9 binary digits - called bits)
This is why an 8bit pixel only has a maximum decimal value of 255.
Since the first value is 0-255, we actually have 256 tonal values per colour channel.
RGB requires 8bit depth, the number of bits used by each of three colour components (channels) of a single pixel, 2^8 or 2x2x2x2x2x2x2x2 = 256 colours.
Scanners and Cameras use red, green, and blue pixels so you need 256x256x256 colours or (8bits of red, 8bits of green, 8bits of blue) combined together to provide the exact colour of one pixel in a 24bit true colour image providing 16,777,216 million colour values.
Most professionals edit imagery using 16bit depth, the number of bits used by each of three colour components (channels) of a single pixel, 2^16 or 2x2x2x2x2x2x2x2x2x2x2x2x2x2x2x2 = 65536 colours.
So you need 65536x65536x65536 colours or (16bits of red, 16bits of green, 16bits of blue) combined together to provide the exact colour of one pixel in a 48bit deep colour image providing 281,474,976,710,656 trillion colours.
Some will dispute that scanning and editing in 16bit instead of 8bit is unnecessary, as the difference is not discernible on a print. In a detailed busy area of an image, it is difficult to view any difference between 8bit and 16bit on a printed image as the human eye can only perceive less than 10 million colours, falling way short of 8bit.
So why use 16bit?
Banding is a common issue in digital imagery due to insufficient colour values available in 8bit to render a smooth tonal gradation, so 16bit helps to reduce banding, but does not completely remove it.
Banding may show in low detailed areas of an image such as sky displaying a gradient from deep blue to a pale horizon.
To reduce banding as much as possible in 16bit the user must set their DSLR camera to save files in RAW 16bit format, then open and convert their RAW files to 16bit uncompressed Tiff files for editing in their software of choice.
Example of file size in 8bit and 16bit:
A scan of a canvas painting 30"x30" at a resolution of 300ppi (pixels per inch) in 8bit is 231MB, 16bit 463MB.
A trade off for quality and file size with positive results would be, always scan or photograph and edit in 16bit, then convert files back to 8bit when you are happy that the image needs no further tonal or colour adjustment, giving you twice as much storage space for your files. Be warned, once you have converted a 16bit image to 8bit you will lose the original 16bit information, but you still have the option to create the file again because you have a RAW file from your camera which is a digital negative. If scanning in 16bit, make a backup of the file before editing.
When you convert 16bit to 8bit, banding will not suddenly appear because the origin of the file was 16bit during editing of tonal values. If you cannot see banding on your monitor, you will not see it on the print.
Printing in 16bit is not necessary as printers only output 8bit at present, however 16bit files can be sent but are converted to 8bit by the printer.
Example below demonstrating a black to white gradient displaying an output selection showing only levels 100-150 from 0-255 (256) available levels. Even with this many shadow and highlight output levels removed, the 16bit file still manages to display a smoother gradient of levels 100-150 almost looking the same as if it were displaying 0-255 levels. The third image has 1% monochromatic Gaussian noise added in Photoshop to help break up any banding lines still seen on the 16bit version.


Colour Gamut
The image above illustrates a comparison of the most popular profiles used, showing the gamut available in each profile.
Imagine gamut as a virtual container full of all colour available.
Colour space is the range of gamut available in a profile.
Colour profiles are used for assigning (tagging) to files for communicating the numerical colour data between devices.
There are many colour space profiles available but most commonly used are Adobe RGB 1998 and standard sRGB.
Adobe RGB 1998 has approx a 35% wider colour gamut than standard sRGB, providing photographers higher saturation and depth in their prints using a Giclée printer that can pretty much reproduce nearly all of Adobe RGB 1998.
Another much talked about profile, ProPhoto RGB currently has the widest gamut available and is the choice for some photographers. Its full gamut range is way past what any professional monitor can currently display. ProPhoto RGB gives the user the ability for editing their master files with the minimum of clipping from the red green and blue channels due to the much wider gamut, containing about 90% of the (virtual container) in this profile.
The current issue with this profile is that is there is not any output devices (printers) that can actually make use of it yet. Additionally, the additional gamut contained in ProPhoto contains mostly the oversaturated colours beyond the gamut limit of Adobe RGB 1998 that are not representative of colours generally seen in photography. However, this profile may be helpful for illustrating bright fluorescents.
I use Adobe RGB 1998 because most professional monitors can display 98% of its gamut and 100% of its gamut on the latest generation monitors.
Therefore, Adobe RGB 1998 gives an accurate representation of what prints will look like on a calibrated display when output to a printer capable of reproducing it such as a Canon or Epson wide format Giclée printer.
Additionally, during my time using Adobe RGB 1998, I have never had any prints from my Giclée printer that have given unsatisfactory results in reference to gamut as seen on my monitor.
Example below illustrating the on-screen colour gamut difference reproduced in a Giclée fine art print with Adobe RGB 1998 profile embedded, and the same image printed on a traditional press in CMYK. The images below represent each profile (as viewed on this website) and are for illustrative purposes only.
In addition, saturation and depth shown on actual prints will vary accordingly regarding the chosen substrate used for printing.
Furthermore, online web browsers do not support Adobe RGB 1998 for online display, therefore, imagery uploaded with Adobe RGB 1998 profile embedded in the file is converted down to standard sRGB (as viewed on this website) which is approx 35% less gamut than Adobe RGB 1998.
Allowing for this, the images will illustrate the difference between the profiles used.
The left hand images are created in Photoshop with Adobe RGB 1998 profile embedded displaying the wider colour gamut, the right hand images displaying the CMYK profile embedded.
Overall, the differences may appear subtle shown in the photograph but the wider gamut can be seen looking at the orange on the vehicle, the bottom images show the difference in the profiles referencing solid colours.


© Copyright. All rights reserved.
We need your consent to load the translations
We use a third-party service to translate the website content that may collect data about your activity. Please review the details in the privacy policy and accept the service to view the translations.